Choosing the best video editing software based on marketing promises will break your production timeline before you cut your first frame. Most comparison guides assemble technical feature sheets without checking if the timeline engine can play back a single stream of 10-bit footage without crashing a mid-range laptop computer.
In March 2026, our team ran benchmark performance tests on four foundational beginner platforms using a standard consumer machine. We discovered that render efficiency and timeline layout clarity matter far more than flashy automated adjustments or premium transition presets.
This playbook eliminates the trial-and-error phase of your post-production journey. We break down the absolute baseline interfaces, map out a repeatable assembly workflow, and provide side-by-side performance reviews of options that actually earn a spot on your storage drive.
Overview
Every modern piece of non-linear editing software shares the same basic structural framework, regardless of price or developer branding. The platform is designed to take raw, unorganized digital media files and sort them into a structured visual timeline. This timeline reads information left-to-right, processing media stacked vertically on independent tracks.
Understanding this layout is essential because it prevents you from feeling lost when switching between different software platforms later.
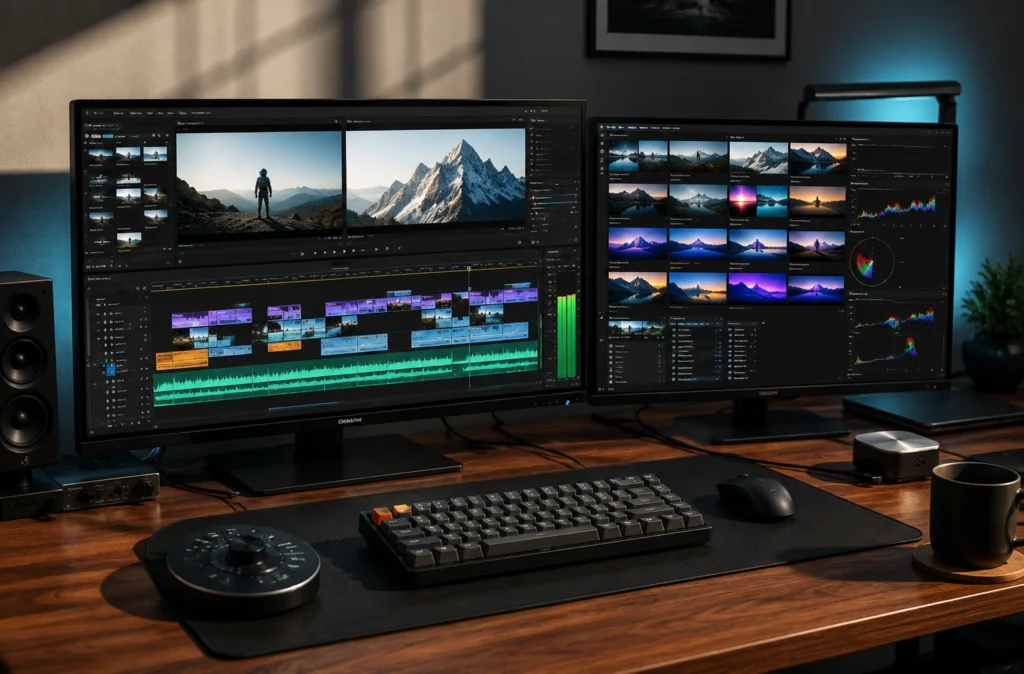
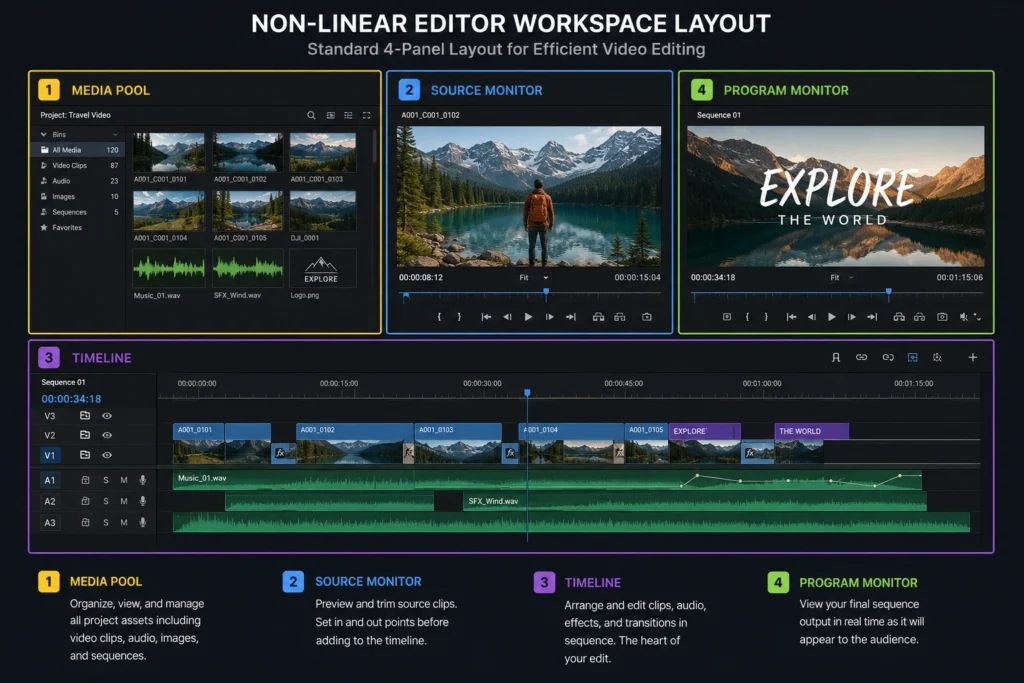
A standard professional editing workspace is built around four fundamental areas: the media bin, the source monitor, the program timeline, and the playback monitor. The media bin functions as your project filing cabinet where you organize source files, audio stems, and graphic assets.
The source monitor lets you review and mark specific portions of your raw clips before moving them. The timeline acts as your active construction site where you stack, trim, and mix assets. Finally, the playback monitor displays exactly what your final export will look like frame-by-frame.
Your primary goal when selecting the best video editing software is finding an application that handles these core zones with zero input latency. If your software stutters for two seconds every time you hit the spacebar to play or pause your timeline, your assembly rhythm breaks down completely. Your choice should match your machine’s hardware capabilities and your primary output format.
Step-by-Step Guide
Executing a clean video edit requires a systematic approach that separates organization from creative manipulation. Trying to color-grade, adjust audio levels, and cut narrative sequences all at the same time is the fastest way to corrupt a project file or run out of system memory. Follow this verified five-step sequence to maintain a clean timeline from start to finish.
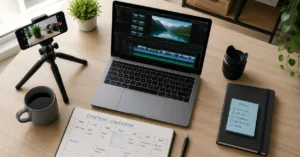
Step 1: Establish your local file directory structure
Before launching your video editing software, create a single root project folder on your fastest internal or external solid-state drive. Inside that folder, create four subdirectories labeled exactly: 01_Raw_Footage, 02_Audio_Stems, 03_Graphics_Assets, and 04_Project_Exports. Drop your raw source assets into their respective folders. This prevents your software from losing file paths later if you accidentally move an asset from your desktop screen to a temporary folder slot.
Step 2: Import media assets and set timeline matching parameters
Open your software and drag your organized subdirectories directly into the application media bin interface. When you drop your first video clip onto a blank timeline canvas, a system alert dialog box will typically ask if you want to match the project settings to your clip attributes. Always click yes. This automatically locks your timeline to the exact resolution and frame rate of your camera sensor, avoiding weird scaling issues or stuttering playback frame conversions.
Step 3: Complete your primary rough cut assembly pass
Scan through your imported clips in the source monitor panel, using the I key to mark your entry point and the O key to mark your exit point. Drop these selected sections onto your timeline track one after another to form your baseline narrative path, known as the radio edit or a-roll assembly. Focus completely on the continuity of your speaking tracks or core events. Do not touch transitions, background music tracks, or color adjustments during this initial pass.
Step 4: Layer your b-roll visual coverage and secondary elements
Once your baseline narrative is tightly locked down with all unnecessary silence trimmed out, move up to video track two to layer your b-roll footage. Drop relevant secondary visual cutaways directly above the corresponding sections of your track-one talking clips. If your b-roll contains background audio tracks that add no value to the scene, unlink the audio component and delete it immediately to keep your timeline tracks clean.
Step 5: Execute audio leveling adjustments and export parameter checks
Normalize your dialogue levels so your peak volume balances out between -6 decibels and -12 decibels on your master output audio meter. Lower your background music beds down to sit between -22 decibels and -28 decibels so they never compete with voice tracks. Navigate to your software export delivery screen, select the H.264 or H.265 video codec format, choose an MP4 container framework, and match your source target bit rate before rendering the project file.
Tips & Examples
Most common editing errors stem from messy project timelines and over-complicating basic narrative sequences. When you look at an experienced editor’s workspace, you won’t see a chaotic stack of dozens of unlabelled tracks. Instead, you see highly organized rows that separate core priorities.
The table below shows an industry-standard template layout for managing a simple multi-track beginner timeline.
| Track Layer | Asset Assignment | Operational Focus Area | Target Measurement Standard |
| Video Track 3 | Text Overlays & Lower Thirds | Safe-zone font scaling, readability | Clear contrast against backdrop |
| Video Track 2 | B-Roll Footage & Cutaways | Contextual visual padding, hides cuts | Match timeline frame rate completely |
| Video Track 1 | Primary Narrative (A-Roll) | Core dialogue delivery, primary story | Locked center framework sizing |
| Audio Track 1 | Primary Dialogue Tracks | Voice tone clarity, removing pops | Peaks hitting -6dB to -12dB |
| Audio Track 2 | Sound Effects (SFX) | Subtle background world cues, impacts | Balanced below voice levels |
| Audio Track 3 | Background Music Bed | Underlying rhythm, scene pacing cues | Constant floor at -24dB to -28dB |
An honest mistake our team committed during a rapid turn-around video launch in late 2025 involved skipping basic file management protocols. We pulled three dynamic asset files straight from a temporary browser downloads folder instead of copying them into our dedicated project directory.
Two days later, we cleared out our browser history files, which broke the links inside our project asset tracking file. We wasted two hours hunting down and relinking those missing media files before we could finalize the render pipeline. Put your assets where they belong before you touch an editing key.
Use keyboard shortcuts from day one of your editing journey. Relying completely on your mouse pointer to select the razor tool, slice a clip, switch back to the arrow tool, and delete empty space adds massive friction to your workflow. Master the Q and W keys for ripple-trimming operations to clear out bad takes in a fraction of the time.
Tools to Use
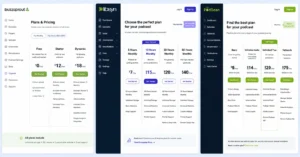
The marketplace for top video editing software options features several highly effective tools built for different hardware specifications and production formats. We tested four platforms extensively to find where they deliver real value and where they introduce unexpected workflow friction.
+-------------------------------------------------------------------------+
|                  VIDEO EDITING SOFTWARE LANDSCAPE 2026                 |
+-------------------------------------------------------------------------+
|  CAPCUT DESKTOP        |  DAVINCI RESOLVE       |  PREMIERE PRO         |
|  - Fast Social Edits   |  - Pro Color Grading   |  - Industry Standard  |
|  - Auto-Captions       |  - Nodes Interface     |  - Deep App Eco       |
|  - Low System Load     |  - Heavy GPU Demand    |  - Monthly Subscription|
+-------------------------------------------------------------------------+
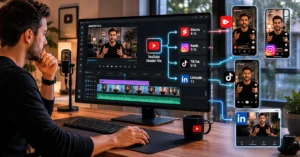
CapCut Desktop: The speed choice for vertical short-form platforms
CapCut Desktop has shifted from a basic mobile conversion app to a highly responsive desktop platform optimized for rapid content production. It excels at automated processes like processing speech-to-text captions, tracking screen elements, and removing simple background layers with one click. The timeline engine runs incredibly well on baseline hardware, making it a stellar option for editing short-form vertical videos.
- Strengths: Excellent built-in auto-caption accuracy, low hardware overhead, and zero-friction vertical format resizing.
- Weaknesses: Advanced professional color-grading control is non-existent, audio track manipulation tools are very basic, and complex long-form timelines become hard to manage.
- Pricing structure: Free baseline access tier with a $7.99 per month Pro plan subscription option for premium asset packages.
DaVinci Resolve: The ultimate color and tracking engine
DaVinci Resolve by Blackmagic Design stands out as an incredibly robust piece of best video editing software review material available today. The platform combines world-class professional color grading, audio post-production, and motion graphics into a single unified workspace. Its color page utilizes a node-based architecture that gives you absolute pixel-level control over your footage.
- Strengths: Industry-leading color correction tools, incredibly stable timeline rendering engine, and a feature-packed free tier.
- Weaknesses: Steep initial learning curve for beginners, demands a powerful dedicated graphics card (GPU), and its node-based workflow requires manual study.
- Pricing structure: 100% free base version with a one-time $295 upgrade pathway for the complete Studio version feature set.
Adobe Premiere Pro: The corporate agency industry standard
Premiere Pro remains a dominant system framework across professional creative agency teams and traditional broadcast houses. Its core strength lies in its tight integration with the wider Adobe Creative Cloud ecosystem, allowing you to copy assets directly into After Effects or Photoshop without intermediate render files. For an in-depth look at managing your production systems to prevent software slowdowns, review our operational analysis on creator tools optimization.
- Strengths: Smooth file sharing across creative apps, massive global plugin ecosystem, and great multi-cam editing tools.
- Weaknesses: Expensive monthly subscription model, prone to random application crashes during major version updates, and high system memory usage.
- Pricing structure: Continuous subscription pricing models starting at $22.99 per month for the standalone application license.
FAQ
Which video editing software is completely free without watermarks?
DaVinci Resolve offers a robust free tier that features zero watermarks on standard exports up to 4K resolution at 60 frames per second. CapCut Desktop also allows free exports, though specific trending assets or advanced tracking tools require a monthly subscription upgrade.
What computer specifications do I need for basic video editing software?
Aim for a minimum of 16 gigabytes of RAM, a dedicated graphics processor with at least 4 gigabytes of VRAM, and an solid-state drive with 50 gigabytes of free workspace. Editing high-resolution footage directly off a mechanical hard drive causes critical playback stutters.
Should a beginner start with Premiere Pro or DaVinci Resolve?
Start with DaVinci Resolve if you have zero budget and want to learn industry-standard color grading within a unified application workspace. Select Premiere Pro if you plan to work inside agency pipelines that rely heavily on a combined Adobe Creative Cloud system infrastructure.
Continue Exploring
- Optimize your creator tools setup to streamline your physical machine setup and eliminate timeline playback lag.
- Master blogging systems monetization to learn how written content engines pair with video production assets to build balanced business models.