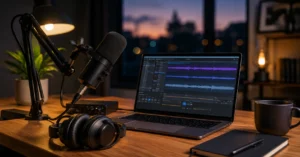
Most beginner podcast setups fail for a simple reason: people spend too much money on the wrong thing.
The first podcast I helped launch used a cheap microphone, free recording software, and a quiet bedroom. The audio was not studio-grade. It was clear enough to publish. That distinction matters because many beginners delay recording for weeks while researching equipment they don’t need yet.
Good podcast audio comes from three things:
- A microphone that captures clean speech.
- A quiet recording environment.
- Consistent microphone technique.
The microphone matters. The room matters more than most people think.
A $40 microphone in a quiet room often sounds better than a $300 microphone sitting beside a loud fan, open window, or mechanical keyboard.
For beginners, the goal is not building a studio. The goal is publishing the first 10 episodes without replacing your setup.
That changes how you should spend your budget.
Under $150, you can build a setup that records interviews, solo episodes, educational content, and YouTube podcasts without feeling limited by your equipment.
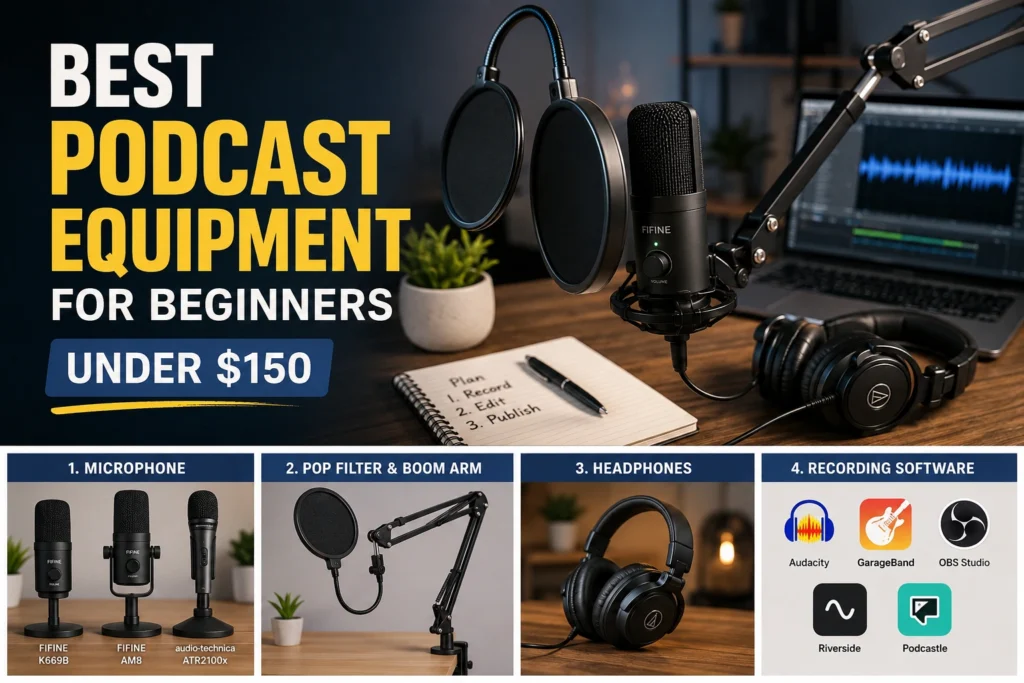
This guide shows exactly what to buy, how to assemble it, and where beginners usually waste money.
Step-by-Step Guide
Step 1: Buy a USB microphone first
A USB microphone is the easiest starting point because it connects directly to your computer.
You don’t need an audio interface. You don’t need extra cables. You don’t need to learn audio routing.
Three beginner-friendly options:
FIFINE K669B
- Usually $30–40
- Plug-and-play
- Good for solo podcasts
- Strong value for first-time creators
FIFINE AM8
- Usually $55–70
- USB and XLR support
- Easier future upgrade path
- Better background noise rejection
Audio-Technica ATR2100x
- Often near the upper end of a beginner budget
- Reliable voice quality
- USB and XLR connectivity
- Common recommendation among independent podcasters
If your budget is tight, buy the microphone first and skip every other accessory until you have recorded several episodes.
That’s the blunt verdict.
A microphone improves your podcast. Decorative equipment improves your desk.
Step 2: Use headphones you already own
Many beginners buy expensive headphones before publishing their first episode.
Don’t.
Your existing wired headphones are usually enough for monitoring and editing.
The job of headphones is simple:
- Hear background noise
- Catch mistakes
- Check audio balance
Until you’re producing regularly, premium monitoring headphones are optional.
Budget allocation matters more than brand names.
Step 3: Add a boom arm only if your desk requires it
Boom arms look professional on camera.
That doesn’t automatically make them useful.
Buy one when:
- Your desk vibrates
- Your microphone stand is awkward
- You record video podcasts
- You need flexible positioning
A basic boom arm in the $15–25 range is enough for most beginners.
Many creators discover they prefer a simple desk stand after buying a boom arm because setup becomes faster.
Step 4: Add a pop filter
A pop filter reduces harsh plosive sounds.
Words beginning with “P” and “B” often create bursts of air that overload microphones.
This is one of the cheapest upgrades you can make.
Typical cost:
- $8–15
The improvement is immediate.
Unlike many accessories, you can hear the difference within seconds.
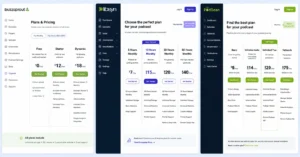
Step 5: Record with free software
You do not need paid recording software to start.
Use:
- Audacity
- GarageBand (Mac)
- OBS Studio
- Riverside free plans
- Podcastle free plans
Many beginners spend more time comparing software than recording.
Record one episode before evaluating tools.
Then evaluate based on real problems rather than imagined ones.
Example Budget Breakdown
Ultra-Budget Setup (~$50)
- FIFINE K669B
- Existing headphones
- Audacity
Total: roughly $50
Balanced Beginner Setup (~$100)
- FIFINE AM8
- Pop filter
- Existing headphones
- Audacity or OBS
Total: roughly $90–110
Full Beginner Setup (~$150)
- USB microphone
- Boom arm
- Pop filter
- Closed-back headphones
- Free recording software
Total: roughly $130–150
Tips & Examples
Record closer than you think
One of the most common beginner mistakes is sitting too far from the microphone.
Many new podcasters position the microphone 12–18 inches away because it looks cleaner on camera.
The result is thin audio and more room noise.
A distance of roughly 4–8 inches often produces stronger voice recordings.
Test before every session.
Small adjustments create bigger improvements than many equipment upgrades.
Reduce room echo before buying more gear
This is where beginners often waste money.
A creator hears echo.
They buy another microphone.
The echo remains.
The room was the problem.
Simple improvements include:
- Curtains
- Rugs
- Bookshelves
- Soft furniture
- Recording in smaller spaces
One creator I worked with recorded inside a walk-in closet for three months. The audio quality improved immediately because clothing absorbed reflections that the microphone was capturing.
Not glamorous.
Very effective.
Script less, outline more
Equipment conversations usually ignore workflow.
That’s a mistake.
A clear episode structure improves listener experience more than a slightly better microphone.
Use a simple outline:
- Opening
- Main point 1
- Main point 2
- Main point 3
- Closing action
This keeps delivery natural while preventing rambling.
Publish before upgrading
Many creators build shopping lists.
Few build publishing habits.
Publishing ten episodes with a $70 microphone teaches more than researching microphones for ten weeks.
The first meaningful equipment upgrade should happen after consistent production.
Not before.
Understand the trade-off between USB and XLR
USB microphones:
- Easier setup
- Lower cost
- Faster workflow
XLR microphones:
- More flexible
- Better upgrade paths
- Additional equipment required
For beginners, USB wins.
For growing shows with long-term production plans, hybrid USB/XLR microphones offer a smoother transition.
Tools to Use
Audacity
Best for:
- Free audio recording
- Basic editing
- Solo podcasts
What it’s good at:
- Stable performance
- Simple workflow
- Large community support
Limitation:
The interface feels dated compared with newer creator tools.
OBS Studio
Best for:
- Video podcasts
- Screen recordings
- YouTube content
What it’s good at:
- Recording multiple sources
- Video and audio together
- Free usage
Limitation:
The learning curve is steeper than basic audio software.
Riverside
Best for:
- Remote interviews
- Guest conversations
- Browser-based recording
What it’s good at:
- Separate audio tracks
- Cloud workflow
- Easy guest access
Limitation:
Advanced features sit behind paid plans.
Podcastle
Best for:
- AI-assisted editing
- Fast production workflows
- Beginner-friendly publishing
What it’s good at:
- Simplified editing
- Voice cleanup
- Speed
Limitation:
Some creators eventually outgrow automated workflows and want deeper manual control.
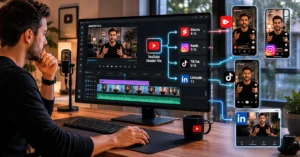
CapCut
Best for:
- Video podcast clips
- Short-form repurposing
- Social distribution
What it’s good at:
- Fast editing
- Templates
- Captions
Limitation:
Complex long-form editing projects become harder to manage.
FAQ:
What is the best podcast equipment for beginners in 2026?
For most beginners, a USB microphone, existing headphones, free recording software, and a quiet room remain the strongest value combination. The goal is reliable publishing, not studio-level production.
Can I start a podcast with less than $100?
Yes.
Many successful beginner podcasts start with a USB microphone between $30 and $70, free software, and headphones already available at home. The room often affects quality more than expensive equipment.
Is a boom arm necessary?
No.
A boom arm helps positioning and desk organization, but it does not improve recording quality by itself. Many beginners publish perfectly usable episodes with standard desk stands.
Should I buy a podcast bundle?
Only if every item in the bundle solves a real problem.
Many bundles include accessories that look useful but add little value. Evaluate each component separately before purchasing.
Continue Exploring
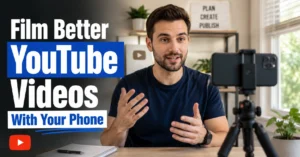
- YouTube & Video Creation Hub If you’re building a podcast that also lives on YouTube, the next step is understanding packaging, retention, and publishing decisions beyond the recording setup.
- creator tools guide: Equipment helps you capture content. Workflow tools help you produce and publish it consistently.